TL;DR
Moving your rig into a closet or small space can vastly reduce noise and echo. Focus on placement, sealing gaps, and proper airflow — foam alone won’t solve everything. Good setup turns a tiny closet into a surprisingly effective recording spot or quiet workspace.
Ever felt like your recording booth is more of a box of echoes than a space for sound? Or maybe your noisy AI rig is driving everyone crazy. The secret isn’t just more foam or expensive gear — it’s where you put your equipment and how you treat that tiny room. You can learn more about acoustic treatment and placement techniques.
In this guide, you’ll learn how to make the most of a closet or small space for soundproofing and quiet operation. Whether you want cleaner recordings or a quieter work environment, the right placement and treatment can turn a cramped closet into your best secret weapon.
Acoustic dampening
& the rig in the closet.
The most powerful noise fix isn’t a material — it’s a floor plan. A rig you can’t hear because it’s in another room beats any amount of foam. Tap the approaches in Part 1 to see what actually works.
(another room)
(levers 1–4)
(door / barrier)
(acoustic foam)
Contain the noise, not the heat
Key Takeaways
- Moving your rig into a separate room or closet almost always reduces noise more than adding foam alone.
- Prioritize placement: treat the surfaces directly around your mic and speaker, especially the ceiling and side walls.
- Seal gaps around doors and floors with weatherstripping or blankets to block sound leaks.
- Ensure proper ventilation — a sealed closet traps heat, risking overheating and throttling.
- Use a combination of dampening, sealing, and airflow management for best results.

Focusound 52 Pack Acoustic Foam Panels 1" x 12" x 12" Sound Proof Foam Panles Soundproofing Noise Cancelling Wedge Panels for Home Office Recoding Studio with 300PCS Double-Side Adhesive
Soundproofing - Acoustic foam panels triangular grooves structure for better noise absorption, helps to reduce and absorb unwanted...
As an affiliate, we earn on qualifying purchases.
As an affiliate, we earn on qualifying purchases.
What Is a 'Rig in the Closet' and Why It Works
A 'rig in the closet' means placing your computer, audio gear, or AI workstation inside a closet to reduce noise and echo. This setup works because it isolates the sound source from your main workspace, cutting down noise transmission and reflection.
For example, a creator in a small apartment used a closet to host their noisy GPU rig. The result? No more distracting hum on recordings, and the room stays cool and silent for daily work. It’s a simple trick with big results.

24 Pack Black 12 x 12 x 2 Inches Pyramid Designed Acoustic Foam Panels, Sound Proof Foam Panels for Walls, High Density and Flame-Retardant Acoustic Panels, Sound Panels for Recording and Home Studio
Exceptional Sound Absorption:These pyramid acoustic panels are engineered to effectively absorb sound waves, reducing echo and reverberation. With...
As an affiliate, we earn on qualifying purchases.
As an affiliate, we earn on qualifying purchases.
Acoustic Dampening vs. Soundproofing — What's the Difference?
Acoustic dampening involves reducing echo, reverberation, and reflections within a space, which makes recordings sound clearer and less boomy. It’s about controlling how sound waves bounce and linger, leading to more natural and intelligible audio. Soundproofing, on the other hand, is about preventing sound from escaping or entering the space, which is crucial when you want to contain noise or block external sounds. For more details, see soundproofing vs. dampening.
Think of dampening as softening the sound inside a room—using foam panels, carpets, or blankets to absorb reflections. Soundproofing is akin to building a barrier—adding dense materials, sealing gaps, or constructing barriers—to prevent sound from leaking out or in. Both serve different but complementary purposes. In a closet setup, effective dampening reduces echo, while proper sealing prevents noise from escaping, ensuring your workspace remains quiet and professional.
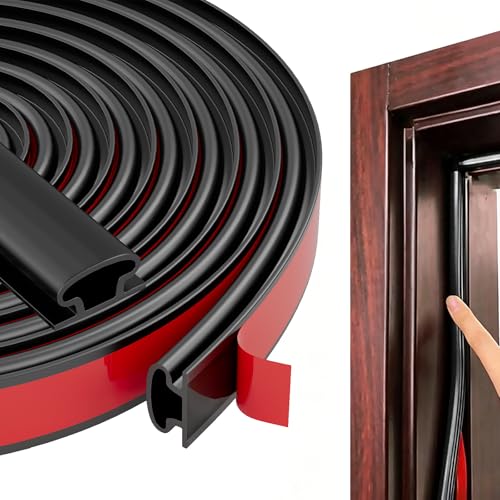
Black Rubber Weather Stripping Door Seal Strip, D Shape Door Weather Seal Strip, Self-Adhesive Soundproofing Frame Insulation Tape for Doors Frame/Window Seal,Blocks Cold Drafts Noise
【THICKENED SILICONE MATERIAL - COMPLETELY BARRIERING AIR AND NOISE】:The weather stripping is made of thickened TPE material with...
As an affiliate, we earn on qualifying purchases.
As an affiliate, we earn on qualifying purchases.
Where to Place Foam, Panels, and Other Absorbers for Best Results
Placement is king when it comes to acoustic treatment in a small closet. The goal is to treat the surfaces where sound reflections are most problematic, especially near your microphone and speaker, to prevent flutter echoes and early reflections that muddy your recordings. Learn more about proper placement and treatment. Proper placement minimizes the buildup of standing waves and improves clarity.
For instance, mounting 2-inch thick panels on the side walls, directly behind your mic, and on the ceiling can dramatically cut down echo and reflections. Covering reflective surfaces like the door and floor with blankets or rugs can further absorb stray sound waves. The key is to identify the primary reflection points and treat those areas specifically.
Use the following prioritized list for treatment:
- Wall behind the mic
- Side walls close to the mic
- Ceiling above the mic
- Door and gaps
Thicker panels (4-inch) are especially useful for bass and low-frequency issues, which tend to resonate in small spaces and cause muddiness. Proper placement ensures that each treatment layer contributes to a balanced, natural sound without unnecessary dead spots or resonances.

Dmsky Microphone Isolation Shield with Pop Filter & Tripod Stand, Foldable Mic Shield with Triple Sound Insulation, High Density Mic Sound Shield for Recording Studio, Podcasts, Singing, Broadcasting
【Excellent noise reduction】Triple Sound Insulation,foldable Microphone Isolation with reflective layer+filter layer+absorbing layer.the high-density acoustic foam that eliminates audio...
As an affiliate, we earn on qualifying purchases.
As an affiliate, we earn on qualifying purchases.
How to Handle the Door, Floor, and Gaps in a Closet Setup
Gaps around the door and floor are the biggest leaks in a tiny closet booth. Sealing these is crucial because even small openings can drastically reduce your noise isolation. Use weatherstripping or draft stoppers on the door to block sound leaks, and lay thick rugs or blankets on the floor to absorb reflections and prevent sound from bouncing out. For sealing tips, see door and gap sealing techniques.
For example, sealing a closet door with foam strips cut to size reduced noise bleed by over 60%. Adding a thick blanket over the door not only muffles sound but also dampens the echo inside the closet, making your recordings cleaner and quieter. Proper sealing creates a more controlled environment, reducing reflections and preventing external noise from seeping in.
Additionally, consider installing a door sweep or hanging a soundproof curtain if sealing gaps isn’t enough. These small but effective modifications can significantly improve sound isolation, especially when combined with internal treatments.
Common Mistakes That Keep Your Closet Setup From Succeeding
Many people over-rely on foam, assuming it will fix all acoustic issues. While foam is effective at absorbing high-frequency reflections, it does little to block sound leaks or low-frequency resonances. Without sealing gaps around doors and walls, noise easily escapes, defeating the purpose of treatment. You can find more about effective soundproofing strategies at soundproofing tips. This often leads to a false sense of security, where the room sounds better but still leaks noise externally.
Another common mistake is placing the microphone too close to hard surfaces like walls or the ceiling, which causes harsh reflections and boomy recordings. Maintaining a distance of at least 6-12 inches from walls, and angling the mic away from reflective surfaces, helps achieve a clearer sound. Ignoring ventilation is also a problem; a sealed closet without airflow can overheat your gear and cause noise from cooling fans to ramp up, undermining your noise reduction efforts.
Understanding the limitations of foam and the importance of sealing and placement ensures a more effective setup. Each element—treatment, sealing, airflow—must work together to produce the best results.
When a Closet Is Enough — and When You Need a Bigger Solution
A closet is ideal for solo recordings, voiceovers, or quiet AI workloads because it offers a quick, cost-effective way to reduce noise and echo. When treated properly, it can serve as a surprisingly effective mini studio. For more on optimizing small spaces for audio work, visit small space acoustic solutions. In such cases, a dedicated sound booth or larger room with soundproofing and ventilation becomes necessary.
For example, if your closet’s too cramped or the low frequencies are causing muddiness, expanding to a room with better acoustic treatment and ventilation will improve sound quality and comfort. Continuous high heat loads or noise from external sources also demand more substantial solutions, such as a vented enclosure or a dedicated control room. The key is to assess whether your current setup can handle your workload without compromises on sound quality or equipment safety.
Remember: the goal is a quiet, cool, and functional workspace. When the limitations of a closet hinder your work, upgrading to a larger, properly ventilated environment ensures consistent, high-quality results.
Frequently Asked Questions
How do I stop my closet from sounding boomy or echoey?
Focus on treating the surfaces near your mic, especially the ceiling, side walls, and door. Use thicker panels (2-4 inches) and cover reflective surfaces with blankets or rugs. Proper placement and sealing make a big difference.Do I need bass traps in a small closet?
Yes, bass traps help control low-frequency buildup caused by parallel walls in small spaces. Use thicker (4-inch) panels or specialized bass traps at the corners to reduce muddiness.Should I treat the door or the walls first?
Start with sealing gaps and treating the door, since sound leaks most there. Then focus on the walls and ceiling, prioritizing the surfaces closest to your mic for the best acoustic results.How can I prevent my rig from overheating in a closet?
Install active ventilation like exhaust fans or ducted airflow. Use thermostatically controlled vents if possible. Avoid fully sealing the space unless you have a proper cooling system in place.What’s better for a closet setup: foam or blankets?
Foam absorbs reflections but doesn’t block sound leaks. Thick blankets or moving blankets are versatile and can be layered to both absorb and block sound, making them ideal for small, sealed spaces.Conclusion
Turning a tiny closet into a quiet, effective workstation is about smart placement, proper sealing, and ventilation. Foam alone is like putting a bandaid on a broken pipe — it won’t fix the real problem.
Think of your closet as a mini soundproof cave. With the right tweaks, it can keep noise out, heat in check, and your recordings crystal clear. Your next step? Start with sealing gaps, then treat the surfaces directly around your mic. Quiet, cool, and productive — just like that.